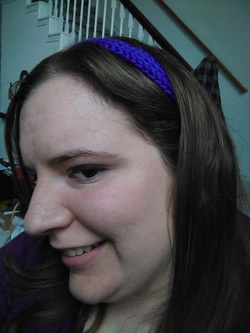
Yes, it is difficult to photograph yourself from the side.
This is less of a tutorial and more of a free pattern. I love the way headbands look, but they never fit my head right... except this one. I also love the knit look without having to actually knit anything. It is awesome. So here is how you do it:
How to Tunisian Knit stitch:
It is a little difficult to get at first from diagrams, but once you get it, it looks awesome. Here is the link to the diagrams I used to learn it.
http://www.crochetmagazine.com/stitch_guide/index.html?content_id=59
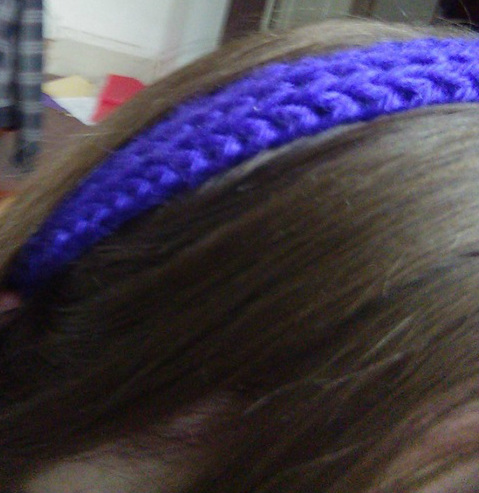
Basically, when doing a forward pass (picking up loops), you have a front vertical string and a back vertical string. For a Tunisian Simple Stitch, you put the hook behind the front string only. For a Tunisian Knit stitch, you put the hook behind the front string, but in front of the back string, through to the back of the work. That is the best way that I know how to explain it. After the first row, it gets easier, because the "v" shapes start to already form themselves. If you still need help, check out some youtube videos.
Pattern
Chain 5
Do a base row
Do a row of tunisian knit stitch
Keep repeating the tunisian knit stitch rows until it is long enough for your head. Mine is about 18 inches for a headband.
If you would like a wider headband, start with more chains.
If you would like a less wide headband, start with fewer chains (I would not suggest less than 3).
Then, sew the short ends together. You can wear the headband with this seam in the back or put an applique (like a flower or bow) over it and wear the adornment in the front.
Embellishment Ideas
How to Tunisian Knit stitch:
It is a little difficult to get at first from diagrams, but once you get it, it looks awesome. Here is the link to the diagrams I used to learn it.
http://www.crochetmagazine.com/stitch_guide/index.html?content_id=59
Basically, when doing a forward pass (picking up loops), you have a front vertical string and a back vertical string. For a Tunisian Simple Stitch, you put the hook behind the front string only. For a Tunisian Knit stitch, you put the hook behind the front string, but in front of the back string, through to the back of the work. That is the best way that I know how to explain it. After the first row, it gets easier, because the "v" shapes start to already form themselves. If you still need help, check out some youtube videos.
Pattern
Chain 5
Do a base row
Do a row of tunisian knit stitch
Keep repeating the tunisian knit stitch rows until it is long enough for your head. Mine is about 18 inches for a headband.
If you would like a wider headband, start with more chains.
If you would like a less wide headband, start with fewer chains (I would not suggest less than 3).
Then, sew the short ends together. You can wear the headband with this seam in the back or put an applique (like a flower or bow) over it and wear the adornment in the front.
Embellishment Ideas
- Sequins on the top, front part (maybe in a zig-zag pattern?)
- Felt Circles in a variety of sizes overlapping in a cloud-like pattern
- Crochet applique
- Embroidered Felt applique (maybe your favorite animal or logo)
 RSS Feed
