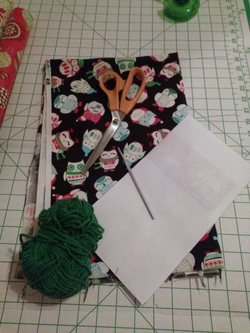
Materials:
Scissors (recommended fabric shears)
1/4 yard of fabric (recommended light weight cotton)
1 skein of yarn (recommended acrylic worsted weight)
crochet hook (recommended E or F hook)
1 roll of ribbon (recommended 1/8 inch)
1 letter sized sheet of paper for the pattern
Scissors (recommended fabric shears)
1/4 yard of fabric (recommended light weight cotton)
1 skein of yarn (recommended acrylic worsted weight)
crochet hook (recommended E or F hook)
1 roll of ribbon (recommended 1/8 inch)
1 letter sized sheet of paper for the pattern
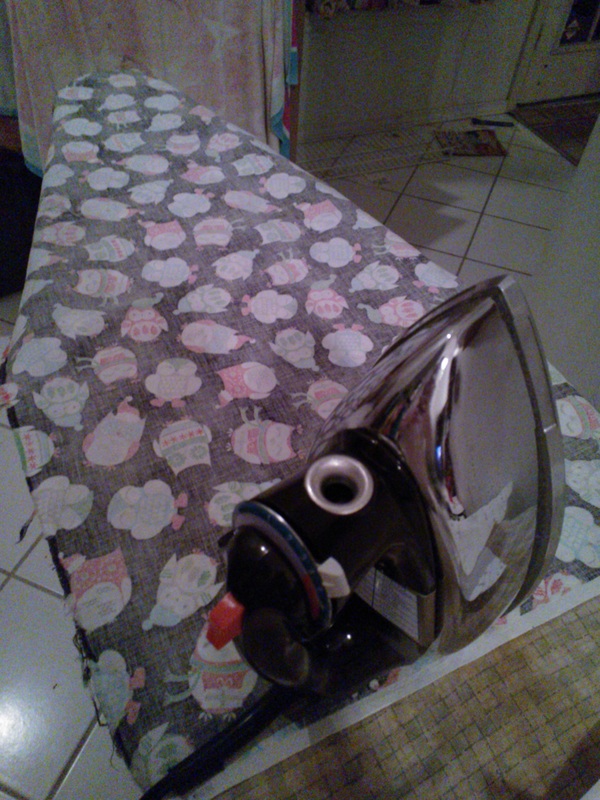
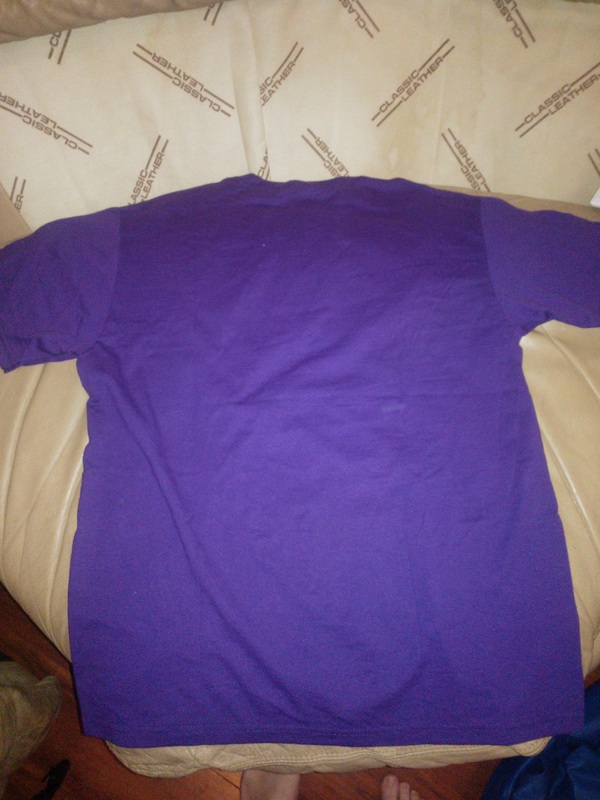
Step 1: Iron
Turn the fabric inside out. Fold it in half. Then, iron out all the wrinkles. This step is optional, but makes the project look really good when it is done.
Turn the fabric inside out. Fold it in half. Then, iron out all the wrinkles. This step is optional, but makes the project look really good when it is done.
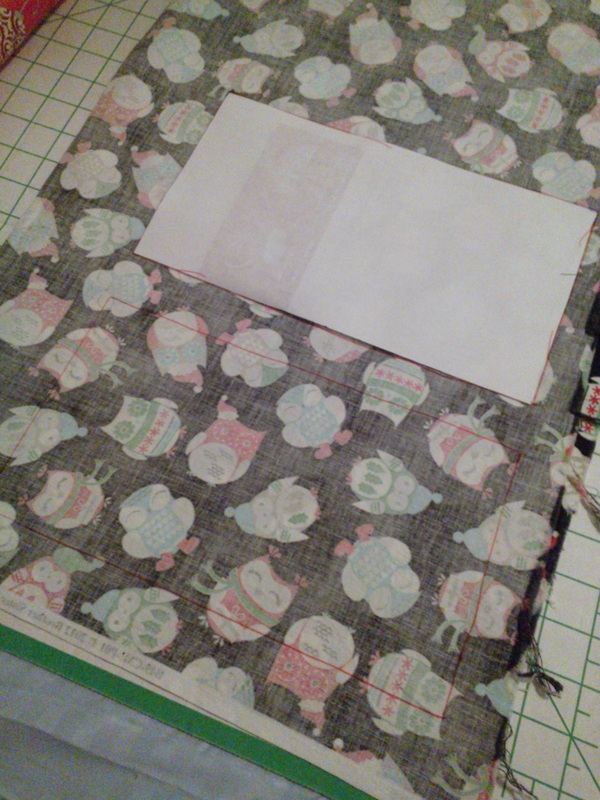
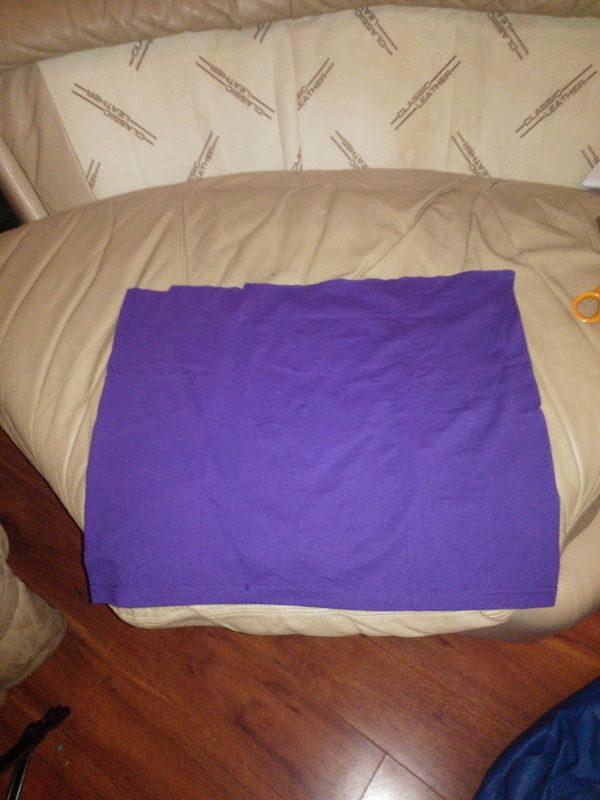
Step 2: Pattern Tracing
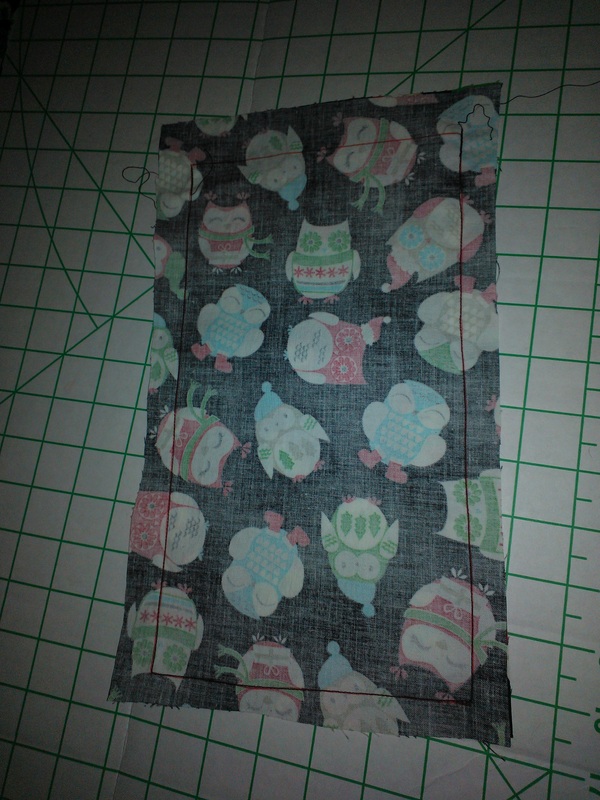
Cut the letter sheet of paper to 6 inches x 11 inches. Then trace it on to the wrong side of the fabric. Keep the fabric folded in half. And keep atleast an inch gap from each side and each rectangle that you trace.
Cut the letter sheet of paper to 6 inches x 11 inches. Then trace it on to the wrong side of the fabric. Keep the fabric folded in half. And keep atleast an inch gap from each side and each rectangle that you trace.
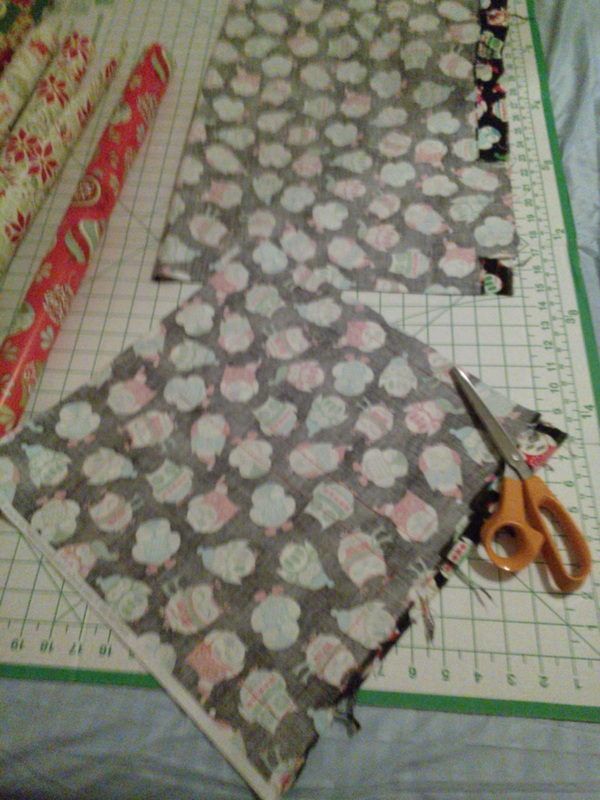
Step 3: Cutting
Cut the rectangles out leaving 1/2 inch seam allowance.
Cut the rectangles out leaving 1/2 inch seam allowance.
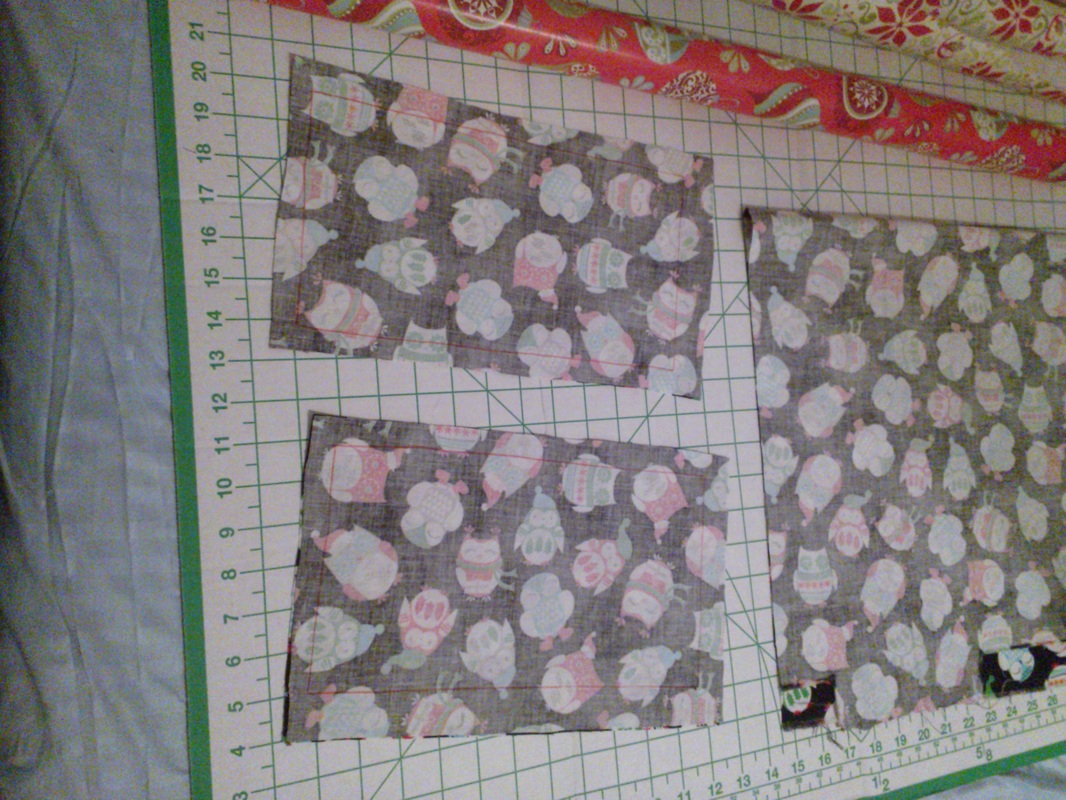
You should have some rectangles that look like these two.
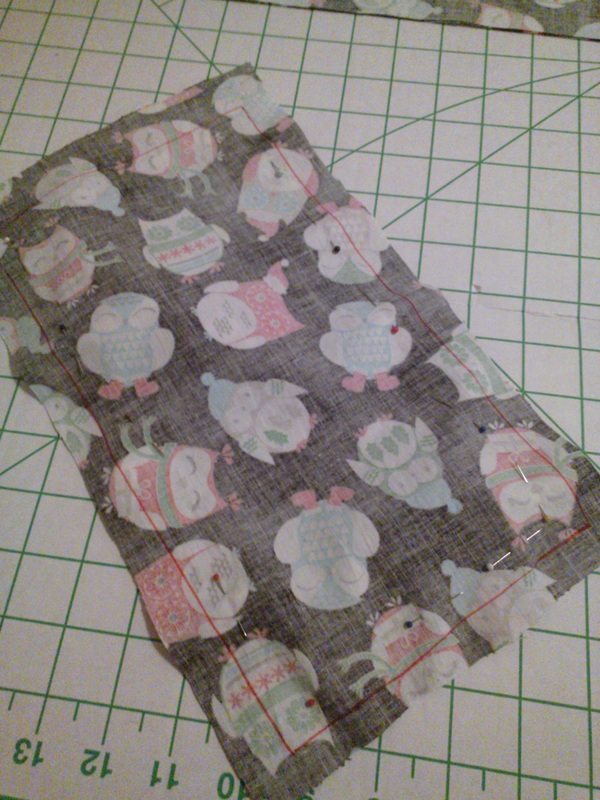
Step 4: Pinning
Pin along the three sides shown in the picture leaving the top side open.
Pin along the three sides shown in the picture leaving the top side open.
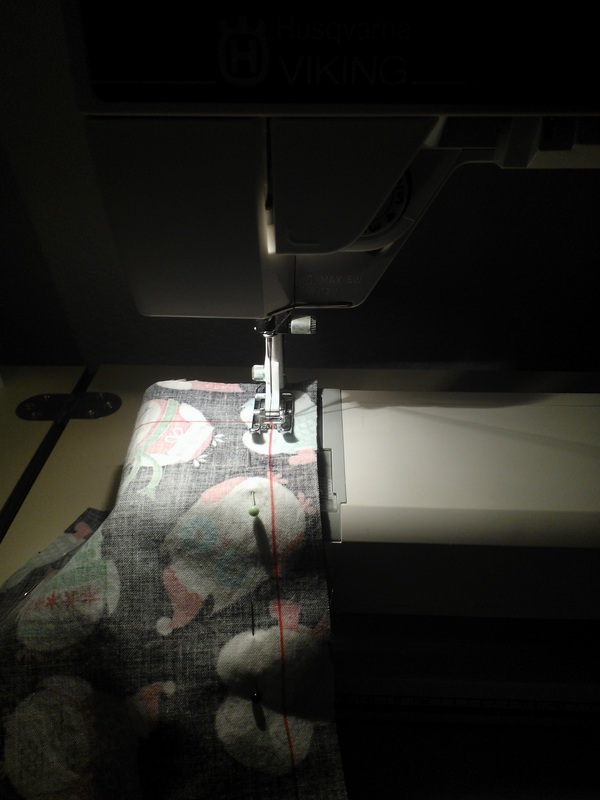
Step 5: Sewing
Sew along the line on the sides that you pinned in step 4. Don't forget to back stitch at beginning and end of sewing. Fold the top part down until the total length from the bottom stitching to the top of the hem is 10 inches long. Then hem the bag with a 1/2 inch seam allowance or 3/4 inch seam allowance.
Sew along the line on the sides that you pinned in step 4. Don't forget to back stitch at beginning and end of sewing. Fold the top part down until the total length from the bottom stitching to the top of the hem is 10 inches long. Then hem the bag with a 1/2 inch seam allowance or 3/4 inch seam allowance.
This is a picture of how the bag should look before you hem the top.
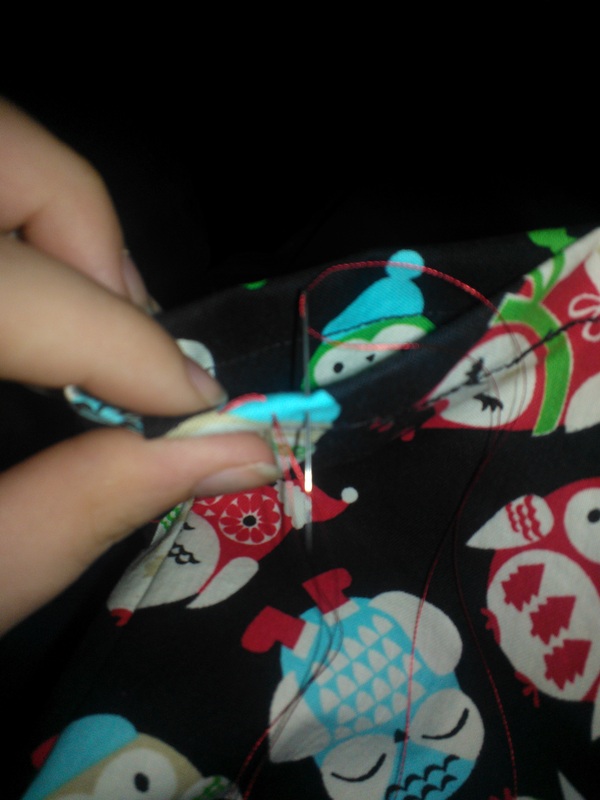
Step 6: Stitching
To create a way to crochet to the fabric, we must first stitch around the edge of the bag. You can take regular thread and either blanket stitch or whip stitch large stitches to put your hook into. Each stitch should be approximately 1/2 a centimeter wide. Use bright colored thread to make it easy to see, because you will need to see it to crochet it later.
To create a way to crochet to the fabric, we must first stitch around the edge of the bag. You can take regular thread and either blanket stitch or whip stitch large stitches to put your hook into. Each stitch should be approximately 1/2 a centimeter wide. Use bright colored thread to make it easy to see, because you will need to see it to crochet it later.
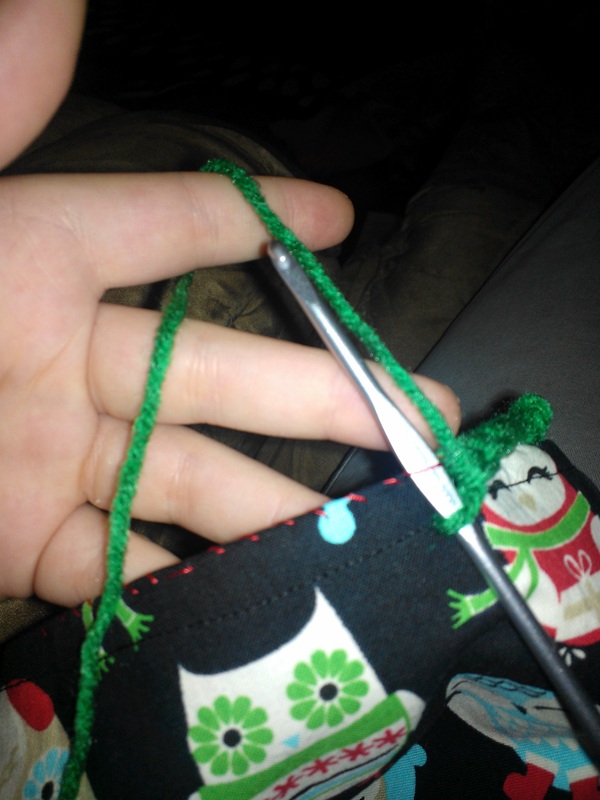
Step 7: Crocheting
With beginning loop on the hook, attach to the first stitch from step 6. Insert hook into each stitch and so a single crochet in each stitch. Join to first slip stitch with a silpstitch. For second row: chain 3, (hdc, chain 1, skip next sc) repeat what is in parentheses around. For the 3rd row: sc in each hdc and chain-space. For the last row: hdc in each sc around. Fasten off.
With beginning loop on the hook, attach to the first stitch from step 6. Insert hook into each stitch and so a single crochet in each stitch. Join to first slip stitch with a silpstitch. For second row: chain 3, (hdc, chain 1, skip next sc) repeat what is in parentheses around. For the 3rd row: sc in each hdc and chain-space. For the last row: hdc in each sc around. Fasten off.
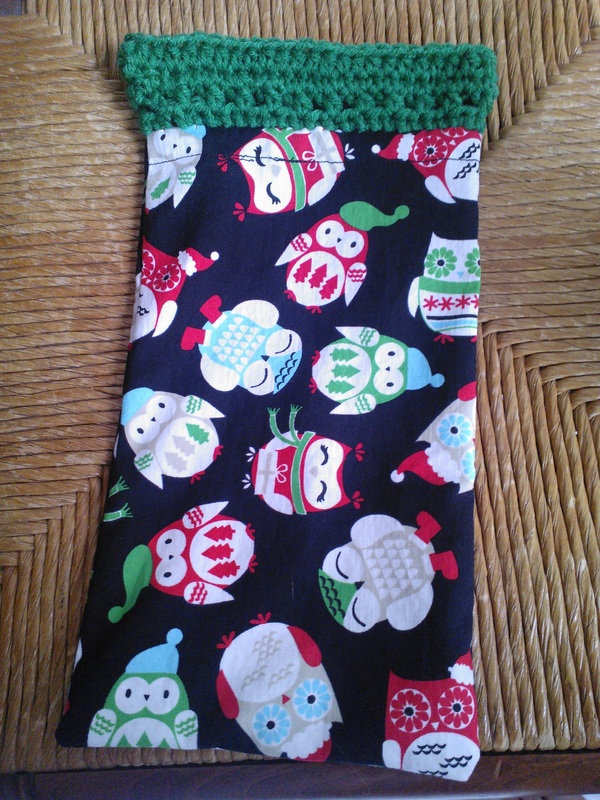
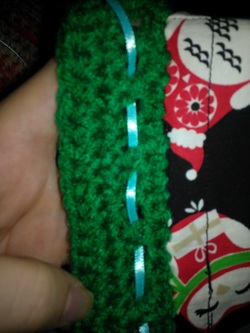
Step 8: Ribbon Weaving
For this step, cut a foot and a half peice of ribbon and weave the ribbon through each chain-space hole. Start with the middle hdc on the side that you want to be the front. When you return to that point, pull the ribbon from one side to make it even. When they are even, pull the ribbon drawstring and tie a bow.
For this step, cut a foot and a half peice of ribbon and weave the ribbon through each chain-space hole. Start with the middle hdc on the side that you want to be the front. When you return to that point, pull the ribbon from one side to make it even. When they are even, pull the ribbon drawstring and tie a bow.
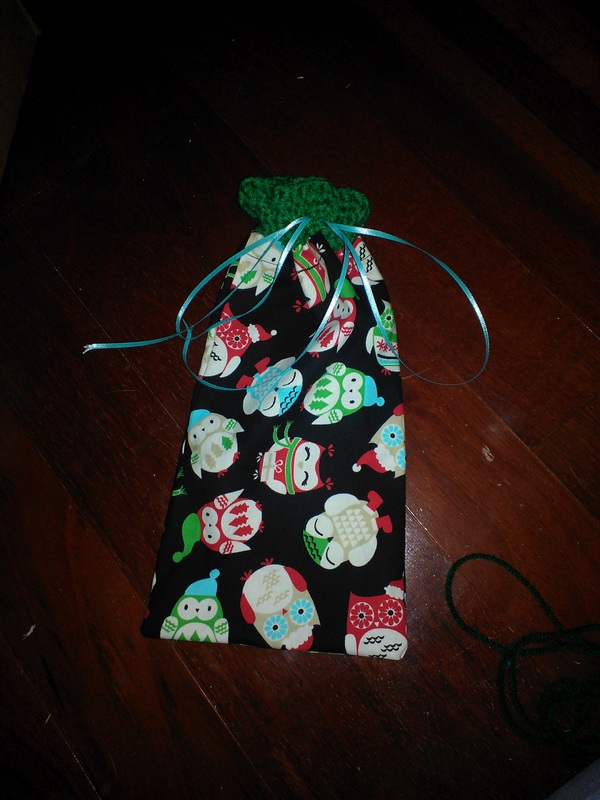
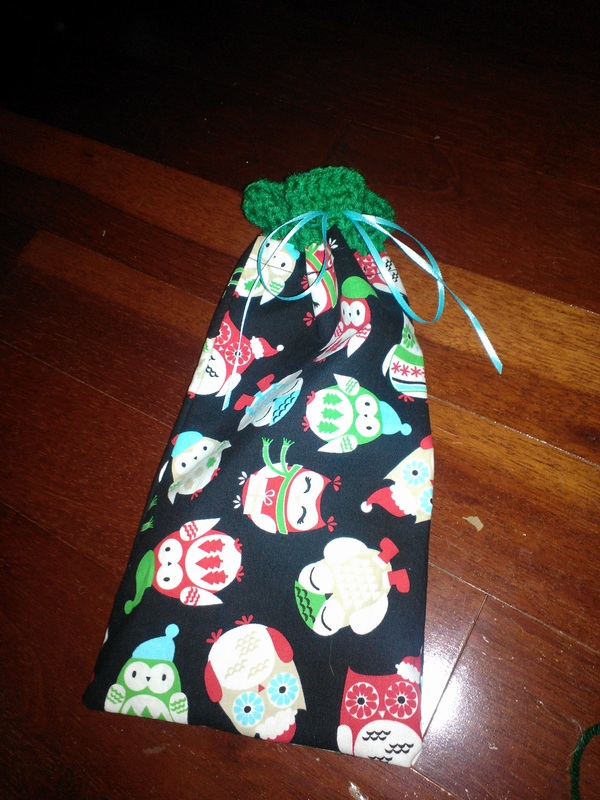
And then you are done! You have a cute bag to give as a gift bag or put your Christmas cookies or candies in.

 RSS Feed
